I was out in Utah visiting a buddy when on one of our scrounging adventures I discovered a Baldor 12 inch grinder for sale. This thing is a brute, but it is also pretty beat up looking from sitting outside. I paid the man 75 Bucks for the opportunity to take a possible pile of scrap home to play with.
Well, I should have known I was chewing on a mouthful when it was decided the grinder and pallet had to be loaded into my truck with a forklift. This made Ruby squat a bit and caused me to wonder how I was going to get this thing out of the truck.
Well, I have no pictures of how rough she looked, but we got it back to my buddy's house, took it apart to get it out of the truck, then proceeded to spend the better part of a week scrounging parts, sandblasting, knocking off grinding concretion, and painting.
About 115 Dollars later and we get it working! Most of the refurbishing cost was in replacing the safety visors, but I also replaced every nut, bolt, and washer possible with stainless steel and bought two rattle cans of paint along the way.
Here it is in the background. This grinder is the largest Baldor grinder that is single phase; meaning it is also the largest grinder likely to be found in a home garage. For a total investment of $190, I now have a refurbished grinder that would cost about $1500 new. The only thing I should replace is the magnetic starter, and then only because the on/off buttons are beat up looking
There is no doubt that a grinder is a requirement in any garage. I just think there's a little Tool Time in all of us so there's nothing at all wrong with overkill.
This is what scrounging is all about. Find something cheap, refurbish it myself, have something nice for far less than it would normally cost to obtain it. Use the leftover garage budget money to find something else to play with.
Showing posts with label Scrounged Items. Show all posts
Monday, January 13, 2014
Akro-Bins in the Garage
Never overlook the possibility of finding great storage bins at a sale of some sort. In this case I'm referring to Akro-Bins, which come in a variety of shapes and sizes.
Here's two varieties in one. The upper bin organizer is plastic and from the mid Eighties. The lower one is made of metal and probably from the early Eighties or before.
It never hurts to take a picture of the bin part number in case you have missing bins and want to try tracking down replacements.
This is another type of Akro-Bin. These are larger and are stackable.
In this case I placed some of them under the workbench in the picture while the rest are to the left.
The early plastic organizer I bought new years ago. The rest are garage sale finds.
Here's two varieties in one. The upper bin organizer is plastic and from the mid Eighties. The lower one is made of metal and probably from the early Eighties or before.
It never hurts to take a picture of the bin part number in case you have missing bins and want to try tracking down replacements.
This is another type of Akro-Bin. These are larger and are stackable.
In this case I placed some of them under the workbench in the picture while the rest are to the left.
The early plastic organizer I bought new years ago. The rest are garage sale finds.
Wire Spool Box from an Old Wooden Crate
I actually found this wooden wire spool box at a garage sale for the princely sum of a Buck. The wire spools that were already in it have hand written dates form the mid to late Sixties. How cool is that?
One could be made from plywood, screws, some metal strips, pipe, and rubber grommets. I modified the cabinet by cutting some of the holes larger and installing larger grommets to accommodate the 12 and 10 gauge automotive wire seen on the third pipe down. Other than that it got a fresh paint job when I hung it where it sits now.
I really like it as it organizes most of my spooled wire and provides a handy dispenser all in one box.
A Buck! The only way to beat that is to break out the scrounge-O-meter!
One could be made from plywood, screws, some metal strips, pipe, and rubber grommets. I modified the cabinet by cutting some of the holes larger and installing larger grommets to accommodate the 12 and 10 gauge automotive wire seen on the third pipe down. Other than that it got a fresh paint job when I hung it where it sits now.
I really like it as it organizes most of my spooled wire and provides a handy dispenser all in one box.
A Buck! The only way to beat that is to break out the scrounge-O-meter!
Mouse Trap as a Glove Holder/Hanger
I spotted the idea of using a mousetrap as a glove holder on another site and decided to give it a try.
I only had to drill a hole in it and it works like a charm! When I need the gloves all it takes is a tug and out they come, ready to use.
Small Charcoal Grill as an Incinerator
I picked up a Weber Smokey Joe grill on one of my scrounging trips and at first didn't have a real use for it as I have a nice propane grill already.
Then I discovered its utility as an incinerator.
In this case I'm burning some scrap wood to get rid of it and have a bit of warmth on a sunny winter day.
I can also burn papers I don't want to go in the trash, cardboard, and like items. Afterward, I can spread the ash on my compost heap or in my flower beds to improve the mineral content in them.
Check your local ordinances, but I doubt anyone would ever get hassled for burning small amounts of burnable waste in a charcoal grill. I do admit this would probably not work in an apartment complex, but then your chances of having a garage are lower as well.
Then I discovered its utility as an incinerator.
In this case I'm burning some scrap wood to get rid of it and have a bit of warmth on a sunny winter day.
I can also burn papers I don't want to go in the trash, cardboard, and like items. Afterward, I can spread the ash on my compost heap or in my flower beds to improve the mineral content in them.
Check your local ordinances, but I doubt anyone would ever get hassled for burning small amounts of burnable waste in a charcoal grill. I do admit this would probably not work in an apartment complex, but then your chances of having a garage are lower as well.
Use a Silverware Caddy as a Tool Holder
I thought this idea up years ago and I've used it ever since. I found a silverware caddy I liked and now I use it to hold tools I'm using during a project. It keeps them nice and tidy as long as the tool pile isn't overly huge.
They can be found at garage sales, thrift stores, or at the discount store. You could even purloin the one in the kitchen if you can get away with it.
Ice Cube Tray used to Organize Small Parts During a Project
I've seen the use of an ice cube tray to organize small parts during a project in several places. All this means is it works pretty well.
The only problem with the idea is the parts have to be pretty small in order for it to work. It beats just throwing the used up ice cube tray in the trash, so I'm on it!
Baby Food Jars for Storage
Yes, I think it's still possible to get baby food jars in glass containers. The ones I have are pretty old though.
They do have some advantages though. They are smaller than other glass jars, they have lids that reseal decently, and the clear glass makes identifying the contents of the jar pretty easy.
The only real downside is the jar is made of glass making them easy to break if dropped or knocked off the workbench.
Still, they are a decent storage option for free.
They do have some advantages though. They are smaller than other glass jars, they have lids that reseal decently, and the clear glass makes identifying the contents of the jar pretty easy.
The only real downside is the jar is made of glass making them easy to break if dropped or knocked off the workbench.
Still, they are a decent storage option for free.
Saturday, January 4, 2014
Cast Iron Tape Dispenser - Thrift Store Find
I went down to the local thrift store the other day to poke around; just looking for opportunities to add stuff to the garage.
What I like to do is just stand and stare at the items in front of me and let my imagination decide what things might be used for. It also lets me absorb what is on the shelves.
So I'm walking around and I spy sitting on a shelf tucked back into the corner; a tape dispenser! Now a tape dispenser is not something I wold normally get worked up over, but this one is different.
It's made of cast iron!
So I grab it, plunk down the two Bucks they are asking for it and drag it home. I've seen one of these before when I was in the military, and never seen one anywhere else.
It was an ugly tan color so that had to be fixed right away. A session with the rattle can of yellow later, and here is the result.
This thing is just about indestructible! I could use it for a wheel chock, door stop, or self defense weapon. I figure it would take a tank tread or an acid bath to do significant damage to the body. Since there's not a handy reference to size, that's a standard roll of 1 inch masking tape in the dispenser. The best part is the parts that could be damaged, the cutting bar, roll holder, and rubber base are all in perfect condition.
My guess is they aren't made anymore.
And now with a depleted budget I can say I at least picked up an interesting piece of equipment for the garage.
What I like to do is just stand and stare at the items in front of me and let my imagination decide what things might be used for. It also lets me absorb what is on the shelves.
So I'm walking around and I spy sitting on a shelf tucked back into the corner; a tape dispenser! Now a tape dispenser is not something I wold normally get worked up over, but this one is different.
It's made of cast iron!
So I grab it, plunk down the two Bucks they are asking for it and drag it home. I've seen one of these before when I was in the military, and never seen one anywhere else.
It was an ugly tan color so that had to be fixed right away. A session with the rattle can of yellow later, and here is the result.
This thing is just about indestructible! I could use it for a wheel chock, door stop, or self defense weapon. I figure it would take a tank tread or an acid bath to do significant damage to the body. Since there's not a handy reference to size, that's a standard roll of 1 inch masking tape in the dispenser. The best part is the parts that could be damaged, the cutting bar, roll holder, and rubber base are all in perfect condition.
My guess is they aren't made anymore.
And now with a depleted budget I can say I at least picked up an interesting piece of equipment for the garage.
Friday, January 3, 2014
Lazy Susan Tool Caddy
I scrounged this lazy Susan type tool caddy at an estate sale a few years ago and I admit it's nice to have the most used tools parked on it. It's sitting on the near end of the bench just behind the red vise.
I don't even know where to buy something like this, although the usual suspects are worth a look.
If I need the space I can easily move it as well.
I don't even know where to buy something like this, although the usual suspects are worth a look.
If I need the space I can easily move it as well.
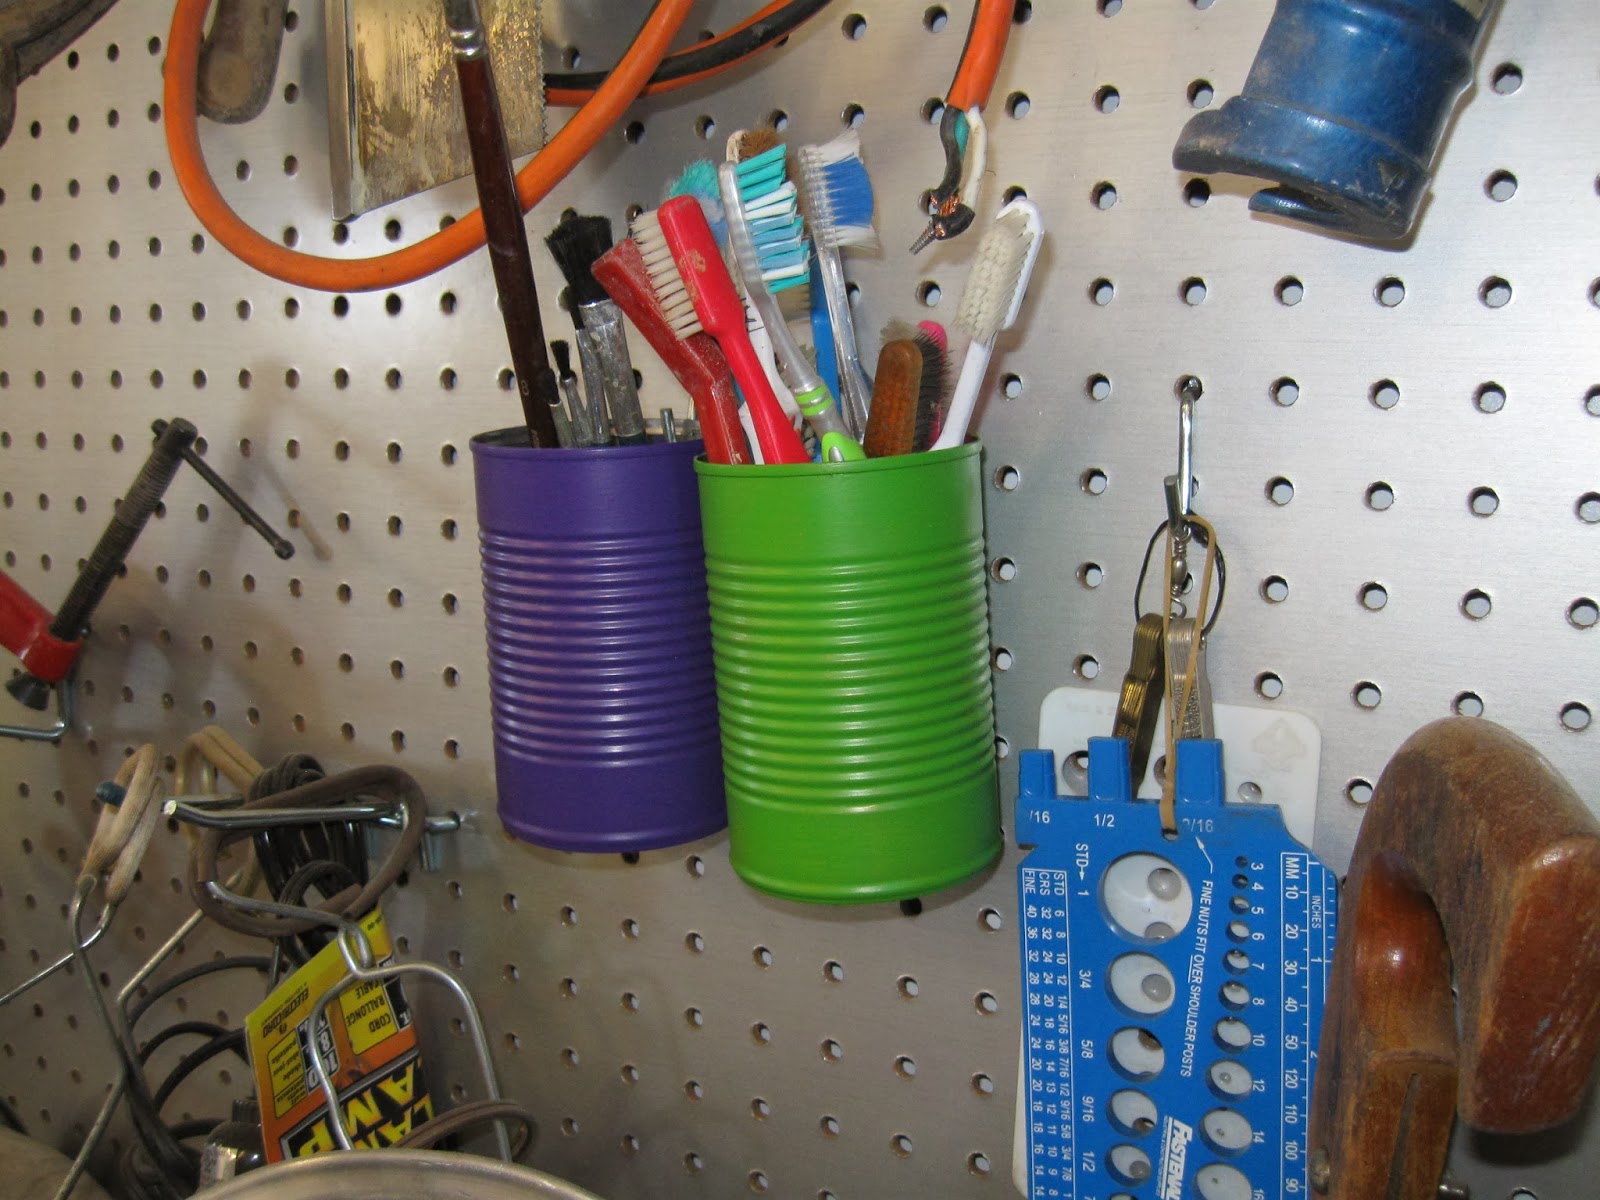
Toothbrushes Recycled into Cleaning Brushes
Don't throw out that old toothbrush! If it still has bristles, it can be used as a cleaning brush in the garage. Since they have soft bristles, they are more than suitable for more delicate cleaning jobs and being plastic they can be used with most solvents.
This picture shows an ample supply of old chomper scrubbers waiting for a chance to clean something besides the pearly whites.
Cheapie Fluorsecent Light for a Workbench Light
I had a cheap fluorescent light lying around and decided to use it to light up my project workbench. This is the type that is mounted using two screws and has an on/off switch to one side near the light bulb.
Here's the light after mounting it.
And here's what happens when it gets bumped.
I fixed that problem with a third screw to keep it from moving.
I know I've seen these at Walmart, but can't remember the price range. Needless to say, retail value doesn't matter if you managed to scrounge it from somewhere.
Here's the light after mounting it.
And here's what happens when it gets bumped.
I fixed that problem with a third screw to keep it from moving.
I know I've seen these at Walmart, but can't remember the price range. Needless to say, retail value doesn't matter if you managed to scrounge it from somewhere.
Broken Windshield Scraper Salvaged for a Shop Bench Brush
I had a favorite windshield scraper finally break on me earlier this winter and just hadn't got around to tossing it. It was a favorite because it had the brass scraper blade and I hate the plastic ones.
So I was cleaning out the truck and saw the broken scraper and picked it up to toss it in the trash when I realized it has a brush attachment that is still in perfect condition.
Well, Dollar Tree sells the shop brushes for, well, a Dollar, but free beats the pants off a Dollar(plus the Governor's cut) any day of the week, so back into the garage for some minor modifications.
Broken Scraper
Broken Scraper getting prepped for a trim. Not shown is the trusty miter box saw I'm planning to use to cut off the remnant of the scrapper blade.
And the final trim job!
I firmly believe that there are never quite enough bench brushes running around my garage and this one has a longer handle than the typical ones I see for sale. At any rate there's one more for the shop and I saved another George Washington for more important endeavors.
So I was cleaning out the truck and saw the broken scraper and picked it up to toss it in the trash when I realized it has a brush attachment that is still in perfect condition.
Well, Dollar Tree sells the shop brushes for, well, a Dollar, but free beats the pants off a Dollar(plus the Governor's cut) any day of the week, so back into the garage for some minor modifications.
Broken Scraper
Broken Scraper getting prepped for a trim. Not shown is the trusty miter box saw I'm planning to use to cut off the remnant of the scrapper blade.
And the final trim job!
I firmly believe that there are never quite enough bench brushes running around my garage and this one has a longer handle than the typical ones I see for sale. At any rate there's one more for the shop and I saved another George Washington for more important endeavors.
Thursday, January 2, 2014
Painting Table out of an Ironing Board
My neighbor was going to toss an ancient ironing board awhile back, and I sweet talked it out of him. I now have an improvised painting table that I can do quick painting jobs on without worrying about the overspray from the rattle cans I use.
Because it has holes in it already I can also hang parts from the edge of the ironing board to get a better squirt on the part.
Here is the board set up to shoot some shelf brackets. No, I didn't actually shoot paint this close to my bikes! Outside with that, Magoo!
This is the label on the ironing board. The address predates zip codes and it says something about the fair trade contract price. I can only assume the ironing board is older than the mid-Sixties. It needed a little straightening here and there plus it will require a spot weld where a weld is broken, but this thing is made like a tank!
I also like the ability to fold it up to put it way. This saves floor space when it's not in use.
Because it has holes in it already I can also hang parts from the edge of the ironing board to get a better squirt on the part.
Here is the board set up to shoot some shelf brackets. No, I didn't actually shoot paint this close to my bikes! Outside with that, Magoo!
I also like the ability to fold it up to put it way. This saves floor space when it's not in use.
Saturday, December 28, 2013
Gotta have a Vise!
I already had two vises, but felt both were too small for any really big or tough projects. I started poking around Craigslist to see what would turn up and to my surprise an old Reed vise was for sale.
I contacted the seller and went out to look at it. I knew nothing about old vises, but this one was big and heavy. It was also one big lump of rust.
I took a chance, paid the man 40 bucks and dragged my boat anchor home.
Lots of rubbing, cussing, filing, honing, electrolyzing, wire wheeling, sand blasting, plus a decent coat of paint later and I finally have a vise that I'm pretty sure will handle most problems I come up with.
Here's the technical info on it. It's a Reed 105 R. It weighs about 73 pounds and has almost no play side to side or up and down. It also has no play in or out. I painted the fixed portion with a undercoat of Rustolium Cold Galvanizing Compound followed by a good black epoxy paint I bought at Advance Auto.
I neglected to get before pictures, but suffice to say, it took me three days just to get the movable jaw out of the thing. The vise has two problems that I see. The first is the movable jaw looks like someone took a hatchet to the top of the back side. There's lots of deep cuts in it. I have no idea why, but it was the reason why it took three days to get the jaw out. I had to file the upper corners followed up with sessions with a honing stone to remove the mushroom on the top side. The other problem is there is a minor flaw in the hardened jaw tooth that looks like a crack between the tooth and the cast jaw. Reed vises have imbedded jaw teeth unlike other makes that are bolted on and I suspect there was a forging defect in this one. The imperfection hasn't failed in 70+ years so I'll live with it.
I mounted it on a Gladiator roll around cabinet I bought back when I had more money than sense. I like Gladiator stuff, but it has a tendency to come out of the box with dents in it. It is also light duty so I decided to beef up the top to take a bit of punishment. The plywood top is 3/4 inch and there's another sheet of 3/4 inch inside the cabinet to sandwich and reenforce the top. I used 5/8 x 3 inch carriage bolts around the perimeter to hold it all together.
I cut two more pieces of 3/4 plywood using the base of the vise as a template, routed the top using a 1/4 round-over bit, and finished up with a nice Varithane stain and sealer.
Now I'm ready to crush some stuff!
Seriously though. A vise is an important investment. A good heavy machinist vise made of ductile iron bought new will run hundreds of Dollars. I recommend keeping an eye out for a neglected antique one for cheap that you can restore yourself. Just don't stoop to buying a cracked, broken, or worn out one.
This whole project; vise, rattle cans of paint, plywood, nuts and bolts, stayed under a Ben Franklin. I also had plywood and paint left over for other projects to boot. A new bought 5 inch vise from Harbor Freight may cost the same or less, but will weigh more like 36 pounds and be made of cast iron which is far more likely to break if you over tighten it.
So, yes Virginia there is a huge difference between cheap and cheapo.
Do this and chances are your vise will still be in your shop ready to give great service when your kids begin fighting over your stuff after your funeral.
I contacted the seller and went out to look at it. I knew nothing about old vises, but this one was big and heavy. It was also one big lump of rust.
I took a chance, paid the man 40 bucks and dragged my boat anchor home.
Lots of rubbing, cussing, filing, honing, electrolyzing, wire wheeling, sand blasting, plus a decent coat of paint later and I finally have a vise that I'm pretty sure will handle most problems I come up with.
Here's the technical info on it. It's a Reed 105 R. It weighs about 73 pounds and has almost no play side to side or up and down. It also has no play in or out. I painted the fixed portion with a undercoat of Rustolium Cold Galvanizing Compound followed by a good black epoxy paint I bought at Advance Auto.
I neglected to get before pictures, but suffice to say, it took me three days just to get the movable jaw out of the thing. The vise has two problems that I see. The first is the movable jaw looks like someone took a hatchet to the top of the back side. There's lots of deep cuts in it. I have no idea why, but it was the reason why it took three days to get the jaw out. I had to file the upper corners followed up with sessions with a honing stone to remove the mushroom on the top side. The other problem is there is a minor flaw in the hardened jaw tooth that looks like a crack between the tooth and the cast jaw. Reed vises have imbedded jaw teeth unlike other makes that are bolted on and I suspect there was a forging defect in this one. The imperfection hasn't failed in 70+ years so I'll live with it.
I mounted it on a Gladiator roll around cabinet I bought back when I had more money than sense. I like Gladiator stuff, but it has a tendency to come out of the box with dents in it. It is also light duty so I decided to beef up the top to take a bit of punishment. The plywood top is 3/4 inch and there's another sheet of 3/4 inch inside the cabinet to sandwich and reenforce the top. I used 5/8 x 3 inch carriage bolts around the perimeter to hold it all together.
I cut two more pieces of 3/4 plywood using the base of the vise as a template, routed the top using a 1/4 round-over bit, and finished up with a nice Varithane stain and sealer.
Now I'm ready to crush some stuff!
Seriously though. A vise is an important investment. A good heavy machinist vise made of ductile iron bought new will run hundreds of Dollars. I recommend keeping an eye out for a neglected antique one for cheap that you can restore yourself. Just don't stoop to buying a cracked, broken, or worn out one.
This whole project; vise, rattle cans of paint, plywood, nuts and bolts, stayed under a Ben Franklin. I also had plywood and paint left over for other projects to boot. A new bought 5 inch vise from Harbor Freight may cost the same or less, but will weigh more like 36 pounds and be made of cast iron which is far more likely to break if you over tighten it.
So, yes Virginia there is a huge difference between cheap and cheapo.
Do this and chances are your vise will still be in your shop ready to give great service when your kids begin fighting over your stuff after your funeral.
Subscribe to:
Posts (Atom)