Like many folks, I've had problems with wood splitting on me when I drive a nail or screw into it. The basic solution is to go as thin as possible with the fastener, but there are a few other techniques as well.
It pays to understand the reason the wood has split in the first place; namely that the nail is displacing the wood fiber and this acts like a wedge to seperate the wood along the grain.
Next, is the wood old? Most wood hardens after it has has a chance to
season. This is why wood just brought home from the lumber yard is
easier to nail into than wood that has been in storage for awhile. The
hard wood is also easier to split than new wood. Greyed and weather
beaten wood also has a greater tendency to split when nailed or screwed
into.
First, try using a box nail or a brad. The thinner nail displaces less of the wood mass which is the source of the split.
Second, if the nail must be a normal sized one for strength, then the thickness of the wood may be too thin for the needed strength.
Third, drive the nail in farther away from the edge of the wood. I go with at least 3/4 of an inch from the end grain edge and an inch or more from the side grain edge. Driving the nail or screw at a gentle angle allows for nailing at a greater distance form the end grain edge as well.
Fourth, blunt the nail point. The blunted point forces some of the fibers of the wood down into the wood along with the nail instead of pushing them aside. This takes a stronger blow or larger hammer to do the job, so be prepared for the extra resistance.
Fifth, drill a pilot hole. I usually select a bit that is no more than 3/4ths of the size of the nail shank so the nail will still grip the wood. For screws, the bit I choose will be slightly smaller than the shank core of the screw. This is the portion of the screw from the area of the threads that doesn't include the threads. It is unnecessary to use a bit that will penetrate as far as the fastener unless the sizes are becoming quite large compared to the thickness of the wood. For common 2 by lumber I would always drill a pilot hole for anything 1/4 inch or more, and use a bit that penetrates as far as the fastener when the shank is 3/8ths or more.
Friday, January 17, 2014
Monday, January 13, 2014
A Great Shop Grinder
I was out in Utah visiting a buddy when on one of our scrounging adventures I discovered a Baldor 12 inch grinder for sale. This thing is a brute, but it is also pretty beat up looking from sitting outside. I paid the man 75 Bucks for the opportunity to take a possible pile of scrap home to play with.
Well, I should have known I was chewing on a mouthful when it was decided the grinder and pallet had to be loaded into my truck with a forklift. This made Ruby squat a bit and caused me to wonder how I was going to get this thing out of the truck.
Well, I have no pictures of how rough she looked, but we got it back to my buddy's house, took it apart to get it out of the truck, then proceeded to spend the better part of a week scrounging parts, sandblasting, knocking off grinding concretion, and painting.
About 115 Dollars later and we get it working! Most of the refurbishing cost was in replacing the safety visors, but I also replaced every nut, bolt, and washer possible with stainless steel and bought two rattle cans of paint along the way.
 Here it is in the background. This grinder is the largest Baldor grinder that is single phase; meaning it is also the largest grinder likely to be found in a home garage. For a total investment of $190, I now have a refurbished grinder that would cost about $1500 new. The only thing I should replace is the magnetic starter, and then only because the on/off buttons are beat up looking
There is no doubt that a grinder is a requirement in any garage. I just think there's a little Tool Time in all of us so there's nothing at all wrong with overkill.
This is what scrounging is all about. Find something cheap, refurbish it myself, have something nice for far less than it would normally cost to obtain it. Use the leftover garage budget money to find something else to play with.
Well, I should have known I was chewing on a mouthful when it was decided the grinder and pallet had to be loaded into my truck with a forklift. This made Ruby squat a bit and caused me to wonder how I was going to get this thing out of the truck.
Well, I have no pictures of how rough she looked, but we got it back to my buddy's house, took it apart to get it out of the truck, then proceeded to spend the better part of a week scrounging parts, sandblasting, knocking off grinding concretion, and painting.
About 115 Dollars later and we get it working! Most of the refurbishing cost was in replacing the safety visors, but I also replaced every nut, bolt, and washer possible with stainless steel and bought two rattle cans of paint along the way.
There is no doubt that a grinder is a requirement in any garage. I just think there's a little Tool Time in all of us so there's nothing at all wrong with overkill.
This is what scrounging is all about. Find something cheap, refurbish it myself, have something nice for far less than it would normally cost to obtain it. Use the leftover garage budget money to find something else to play with.
Spooled Cordage Dispenser
I have a spool of 550 cord that I found at a garage sale years ago. I've had it turn into a rats nest far more than once, so I naturally wanted a solution that puts the cord where I will find it and eliminate rats nests for good.
I hit on the idea of making a dispenser modeled after a paper towel dispenser.
 I scrounged around and picked up the 2x4 wood, a piece of pipe, and screws from around the shop. I routed out the slots for the pipe, screwed it all together and painted it red.
 I then hung it under the twine bobbin I'd already made and hung on the wall. Pretty simple project.
I hit on the idea of making a dispenser modeled after a paper towel dispenser.
Decorating the Garage
Decorating the garage is purely a matter of taste and interests. For myself, I have the license plates taken off of vehicles I've owned. I also have a few vanity signs that I've received as gifts over the years. Others may like to hang antique implements, old skis or any of a variety of old sporting equipment like golf clubs, tennis rackets, baseball bats, and what not.
The general idea though is to decorate the garage using things that reflect interests and tastes using items already on hand or easily found for cheap. If nothing else it can be a conversation starter when visitors come into the garage.

 Both pictures show what basic garage decorating entails. In my case I had the plates and the vanity signs; it was simply a matter of nailing them up where I wanted them.
The general idea though is to decorate the garage using things that reflect interests and tastes using items already on hand or easily found for cheap. If nothing else it can be a conversation starter when visitors come into the garage.
A Wall Clock Helps Keep the TIme Organized
I suggest a wall clock that's easy to read from anywhere in the garage. Having a clock is a great way to time a task or project or to have some means of knowing when to knock off for the day.
I already had a wall clock hanging around in the house so it got pressed into service in the garage.
 I placed it near the door as this was the one place where it could be seen throughout the shop. The lone exception is when I'm sitting at the project workbench, but all I need do is stand up to see the time.
Repurposing the clock cost me a double A battery. It also illustrates the results of beginning scrounging, which is to find stuff I already have that can be used for the need at hand.
I already had a wall clock hanging around in the house so it got pressed into service in the garage.
Repurposing the clock cost me a double A battery. It also illustrates the results of beginning scrounging, which is to find stuff I already have that can be used for the need at hand.
Pegboard's Importance in Organizing the Garage
While buying pegboard usually represents actual cost in setting up a garage, it never hurts to keep an eye out for it when out on scrounging adventures. It pays to know what a sheet retails for in order to avoid paying too much from someone that thinks their stuff is made of gold. The basic pegboard starts at about Nine Bucks for a 4x8 sheet and it goes all the way up to Forty-Five bucks for a hardwood sheet the same size.
 I bought two sheets six or seven years back and hung them in a traditional manner with vertical furring strips mounted at the wall studs to provide space behind the pegboard to mount the hooks. This was necessary due to the finished walls in the garage.
 I'm fortunate that I had room for two sheets. Anyway, the furring strips aren't necessary if the garage has bare stud walls.
 I also cut and mounted a partial sheet to the back of my project workbench.
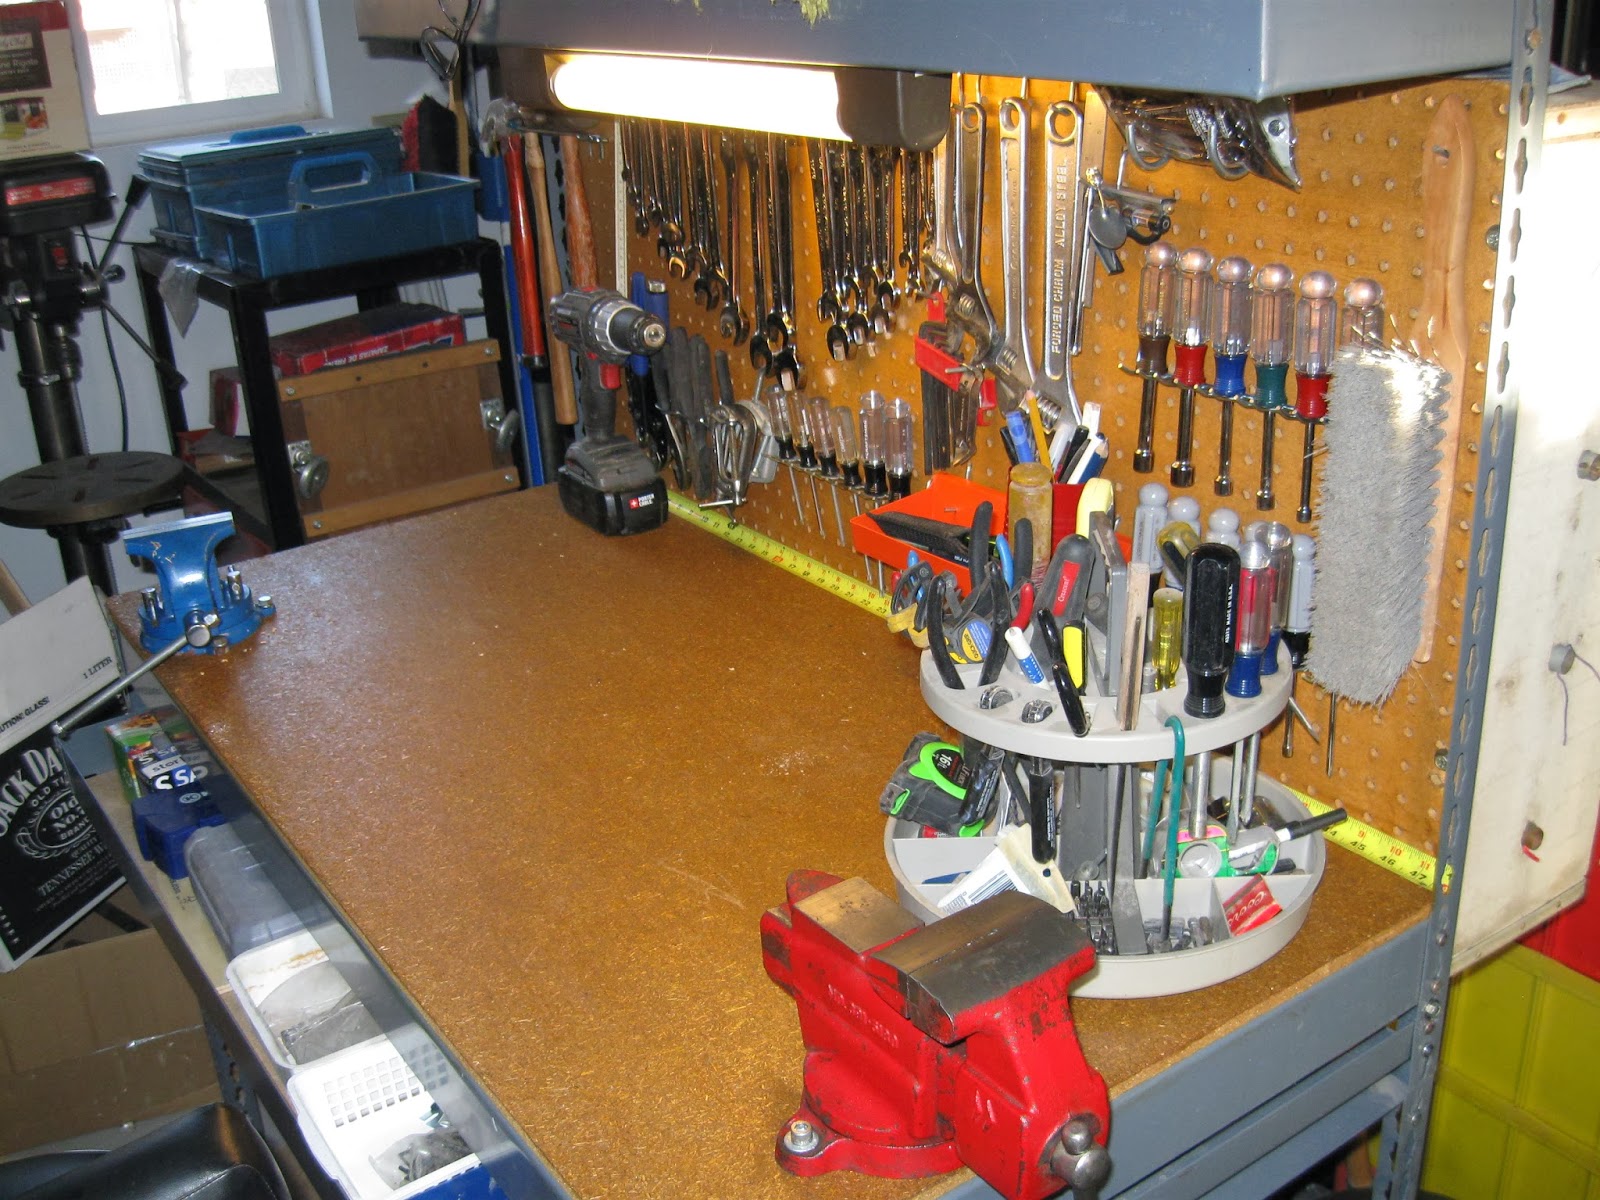 This gave me the opportunity to hang my most used tools right where I'm likely to use them.
Pegboard is important to organizing the garage in a creative manner. While scrounging it is an option not to be overlooked, it doesn't turn up that often. Pegboard also rarely turns up at garage sales because once mounted, people almost never take it down. The only scrounging likely to help reduce the cost is to acquire the screws, washers, furring strips and nails.
Pegboard is important to organizing the garage in a creative manner. While scrounging it is an option not to be overlooked, it doesn't turn up that often. Pegboard also rarely turns up at garage sales because once mounted, people almost never take it down. The only scrounging likely to help reduce the cost is to acquire the screws, washers, furring strips and nails.
Akro-Bins in the Garage
Never overlook the possibility of finding great storage bins at a sale of some sort. In this case I'm referring to Akro-Bins, which come in a variety of shapes and sizes.
 Here's two varieties in one. The upper bin organizer is plastic and from the mid Eighties. The lower one is made of metal and probably from the early Eighties or before.
 It never hurts to take a picture of the bin part number in case you have missing bins and want to try tracking down replacements.
 This is another type of Akro-Bin. These are larger and are stackable.
 In this case I placed some of them under the workbench in the picture while the rest are to the left.
The early plastic organizer I bought new years ago. The rest are garage sale finds.
The early plastic organizer I bought new years ago. The rest are garage sale finds.
Subscribe to:
Comments (Atom)